
Wondering how to hand dip taper candles? If it is your first try making taper candles at home, give this a good read. In this article, you will learn what wax and wick to use and how to create beautiful taper candles with your own hands.
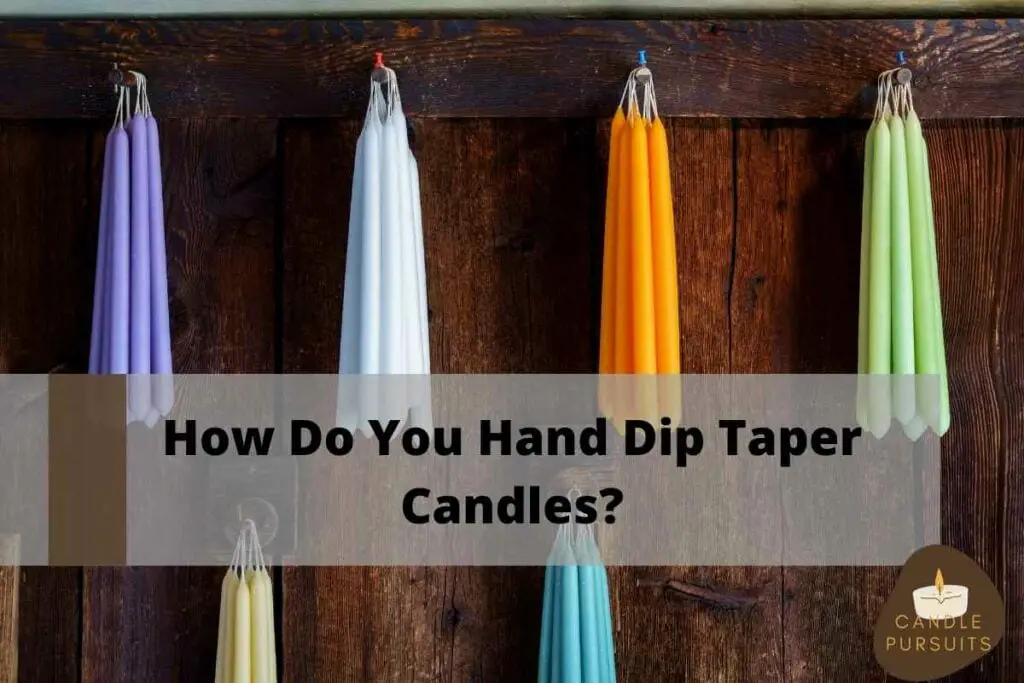
Taper candles are created by hand-dipping a wick into the wax and not using a container or mold. By attaching a long wick to a handle to create two wicks for a pair of taper candles. Each time you dip your wick into the wax, you allow it to cool for a few minutes before dipping it again until you reach the desired candle thickness.
You can easily make taper candles at home using basic equipment and minimal ingredients. Learn how to hand dip taper candles, what to use and where to put them. It’s time to develop your candle-making skills!
Guide To Hand Dip Your Taper Candle At Home
Taper candles are slender, tall candles that are not confined by a vessel. They are made of hard and durable wax and can be placed in candle holders to keep them standing upright. They can be made by hand-dipping them into the wax instead of using a container or mold to form the body of the candle.
Hand dipping taper candles is an ancient practice, and the technique has not changed. Let’s explore what you need to make taper candles and how to dip them by hand.
Ingredients and Equipment You Need To Hand Dip Taper Candles
To hand-make taper candles at home, you need to ensure you have the correct ingredients and equipment. Also, ensure you have a clean bench or workstation before you start.
The Ingredients
Here is a list of the ingredients that you need to make hand-dipped taper candles at home.
The most popular wax to use for taper candles is paraffin wax or beeswax. This is due to their hardness, durability, and their long-lasting burn. They can keep their shape and remain sturdy as a stand-alone candle without a vessel.
Using soft wax will cause the candle to fall apart, so avoid using soft waxes such as soy wax. However, you can play around with mixing different hard waxes together to get different textures and colors.
The best wick to use for taper candles is flat braided wicks or square braided wicks. They are both made of 100% natural fibers and have chemical treatment on the outside to improve burn performance.
The square braided wick is better suited for taper candles made of beeswax because the wick was specifically designed for beeswax and it has an open construction design, which is great for thick and sticky waxes. Whereas the flat braided wick is self-trimming and allows for an even burn.
The wick you use will be twice the length of one taper candle as you make two taper candles at one time, and the wick goes all the way through the middle of the candles. Using the correct wick is vital, as it is what draws up the wax to the flame.
The Equipment
Here is the equipment needed to make your hand-dipped taper candles at home.
You will need to set up a double boiler. This can look like using a pot with water and placing a bowl in it. You must ensure that the bowl or pot used is deep enough to fit the length of the candle into it without hitting the bottom. The most common size of a taper candle is 12 inches, but the benefit of making it yourself is that you can choose the length you make.
You could use a metal or glass bowl, and work with what you have at home. The purpose of the double boiler is to melt your wax and to keep it warm while you make your taper candle.
You need a thermometer to know what the temperature of the wax is. Without a thermometer, you will not know the correct temperature to keep the wax at while you dip the candles or what temperature to add fragrance or dye if you are going to add that in.
You want to make a holder or rig for the purpose of attaching the end of the wicks onto it and also being able to hold it for the dipping process. You could make one out of wire, use a coat hanger or anything else that is easy to hold and can hold the weight of the candles. You also want something to hang it up on while it is drying, such as a hook or laundry rack.
A small weight needs to be added to the ends of the wick to keep the wick straight and weighed down while dipping them into the wax. You can use some nuts or bolts or something similar that you have at home.
The Process Of Hand Dipping A Pair Of Taper Candles
Step 1 – Melt And Heat The Wax
You will need to set up your double boiler and melt your wax. Fill up the base pot with some water and get it boiling. You want to ensure you fill your pot or bowl that is in the water with enough wax so the whole length of the candle can fit in. Approximately 8 ounces makes two taper candles. You want to keep the temperature wax at 165°F while you dip your candles.
However, if you are adding fragrance oil or dye to your taper candles, ensure you heat the wax to around 165°F to add these in and stir them in slowly. You will then want the wax to cool to 165°F so you can start the dipping.
Step 2 – Dip Your Tapers Into The Wax
Using your taper holder with the wick attached, therefore having two long ends hanging down with a weight tied on the ends, it’s time to dip them into the melted wax. Dip your tapers into the wax smoothly and continuously, don’t keep the candles submerged and still in the wax.
After each dip, ensure you let the candle cool for a few minutes before dipping it again. If you do not allow the wax on the wick to cool, then it will most likely fall off and will not form a candle. You can cut the weights of the ends of the wicks when they are no longer needed due to the increased weight of the candle.
Step 3 – Reach The Desired Thickness And Cool
You can do as many dips into the wax as you like until you get the desired thickness that you want for the candle. If you have candle holders already, you can measure them to see how thick you need your candles to be to fit in them.
When you are finished, you can hand your candles up by hanging the holder on a hook or whatever you have chosen to use. Allow them to cool completely. This takes about 6 hours, but it is best if you can leave them overnight.
Step 4 – Use Them Or Store Them
The last step is to cut the wicks and enjoy the two taper candles you have made! Cut the wicks so they are a ¼ of an inch long. Put them into candle holders if you have them or else measure your candles and purchase or make your own taper candle holders based on the size you have created.
If you are not planning on using your taper candles and would prefer to store them until you want to use them, you can keep them hanging upside down in a cool environment.
Take note of what you use, the quantities, and how your taper candles turned out. You can then make adjustments for your next batch or if they were great, the first time you know the exact recipe to follow.
Paraffin Wax VS Beeswax – What To Use for Taper Candles
Not sure what wax to choose when making your hand-dipped taper candles? Let’s compare the two most popular waxes used to make taper candles today. Let’s take a look at paraffin wax and beeswax and find out what one is best for you to use based on your needs.
Comparison Between Paraffin Wax And Beeswax
From this table, you can see that even though paraffin wax and beeswax have some similarities, such as both being hard, durable waxes, they also have some key differences in their properties.
If you want a natural, sweet-smelling, clean pillar candle, then beeswax is a great option for you. However, if you want to add dye and fragrance to your pillar candle, using paraffin wax would be your best option.
Adding Fragrance And Dye To Taper Candles
You can add fragrance and dyes to your taper candles. However, if you are doing so, it is best to do this with paraffin wax. This is because beeswax has a natural yellow color and has a poor hot throw. Therefore, it is difficult to smell the fragrance that you have added to the beeswax pillar candle.
Paraffin wax can be dyed and fragrance added, as it is a white wax and has the ability to provide a strong-smelling candle. You can add the dye and fragrance to the paraffin wax at around 180°F and stir in slowly. Allow the wax to cool to 165°F before you start dipping the candles into the wax.
Taper Candle Holders And Where To Put Them
Taper candle holders are important to use as taper candles cannot stand up by themselves. Unlike pillar candles, which are thicker and sturdier and can stand alone or be placed in a candle holder. You will need to select a candle holder that fits the size of your taper candle to ensure it stays straight and fixed in its location.
There are many different types of taper candle holders available. You can get ones for a single candle or to hold multiple candles. They can be made out of a range of materials, colors, textures, and styles.
Common areas to keep taper candles include the living room, such as displayed on the dining room table, on a mantle, on a cabinet, on a coffee table, or on a shelf. You may also keep a taper candle holder in your bedroom or bathroom where you like to have candles lit for the purpose of creating a romantic or relaxing atmosphere.
Taper candles are also popular candles to use in churches or sacred places or even at your own home, at your prayer altar, or in a sacred place. They have been around for centuries, so they tend to provide an ancient and spiritual feel to a space.
Just like any candle, ensure you keep your taper candles away from anything that could catch on fire. Keep it in a room that does not have a draft and if the candle is lit, keep your eye on it. If you leave the room, distinguish the flame of the candle.
Homemade Taper Candles VS Store Bought Taper Candles
You can buy pre-made taper candles, but it is a lot more fun to make your own, especially as it is different from making your standard candle in a jar. Hand dipping your own taper candles can be a fun project to do and you only need minimal equipment to do so.
By making your own taper candles, you can decide on the wax you use, how big or thick you make them, and if you want to add any color or fragrance to them. You can create a completely custom candle, knowing how it was made and what the ingredients are.
You can easily buy your wick and wax off Amazon and get it delivered to your home, so all you need to do is candle making.
Frequently Asked Questions
How Long Does It Take To Make A Hand-Dipped Taper Candle?
It will take approximately 30 minutes to make your taper candle. This includes the pair of candles on the one wick. The time can vary due to how many dips you do and the exact amount of waiting time you do between each dip when you allow the candle to cool. Take your time with the process. Don’t rush it.
Is It Safe To Make Your Own Hand-Dipped Taper Candles?
It is safe to make your own taper candles if you ensure you have the correct equipment needed and do not touch the hot wax with your hands. It is vital to have your wick attached to a holder of some sort so you can hold on to that, instead of getting your hands close to the wax by using your hands and touching the hot wick.
How Do You Burn Taper Candles Without Making A Mess?
It is important that you keep your candle upright and straight to avoid it making a mess by wax dripping off onto your furniture. Beeswax is a good choice, as it does not drip as easily as other waxes do. Also ensure you stay away from using soft wax as the candle may bend or collapse due to its weight of it, as it is not as hard as paraffin or beeswax.
How Long Does A 12-Inch Taper Candle Burn For?
A 12-inch taper candle will burn for approximately 12 hours. However, it will be dependent upon the size of the candle and what wax and wick were used, as well as how well it was made.
Final Words
To hand dip taper candles, you need to use a strong wax such as paraffin or beeswax in a large pot or bowl. Ensure it is deep enough so you can fit the length of the candle in the wax. Use a flat or square braided wick and create a holder so you can hand-dip the candles into the wax. Enjoy making your hand-dipped taper candles!