
Whether you are making pillar, container, or votive candles, sometimes you may catch sight of sinkholes occurring right in the middle of the candle. When crafting the candles, you can be super meticulous and cautious, but sinkholes can still appear. So you might be wondering how to fix candle sinkholes without a heat gun if you don’t have one around.
If you don’t have a heat gun around, the next best option to fix a sinkhole in a candle is to use a hairdryer. The “second pour” procedure is also a viable option to fix sinkholes quickly.

Sinkholes are the arch-enemy of a beautiful candle. No one wants to witness a sinkhole in the middle of their candle after they have worked so hard to make it. Even if you don’t have a heat gun lying around, there are easy ways to fix it in no time. I will share these methods in detail in the rest of the article. So, stick around!
Why Do Candles Get Sinkholes?
When pouring the wax into the container, it slowly shrinks, making a hole in the middle. This gap is called a sinkhole and appears because when the wax cools, it hardens.
Sinkholes are the big holes around your wick that look like craters. One candle can have more than just one of them in it, and they don’t necessarily have to be in the middle of the wick. They can appear anywhere around the middle and come in different sizes and depths, directly affecting how the candle wick works. Sinkholes may occur because of the various reasons –
1. High Temperature
Sinkholes mostly appear when the molten wax is poured at high temperatures. So when you pour molten wax, it’s essential to keep an eye on the temperature. If you don’t want sinkholes in your candles, pay close attention to the room temperature, the temperature of the wax, and the container’s temperature.
Homemade candles and candle melt often have holes in them. If you work with soy wax, sinkholes can be a significant issue. They are also a grave issue when working in a low-temperature room. As edges cool down faster than the middle, holes appear quickly.
2. Wax Type
More often than not, sinkholes appear because of the type of wax you are using. If you don’t want sinkholes to occur, it’s best to use single-pour wax. You can tell if the wax is “single pour” simply by looking at the label.
Remember that votive wax is more likely to get sinkholes in it purely because of its nature. So before getting irritated about sinkholes appearing in your finished candle, it’s best to learn about their nature first.
3. Container
Sinkholes can also appear because of the size and shape of your container. If the container you use is taller or narrower, it’s most likely that sinkholes will appear.
So most candle makers suggest using containers that are shorter and wider. The wax sticks along the edge better in these containers, preventing sinkholes.
How To Prevent Candles From Getting Sinkholes?
There are numerous ways to prevent your candles from forming sinkholes. Preventing them from appearing is always a better option than fixing them later. The best ways to prevent sinkholes from appearing in your candle are:
1. The Right Temperature
Sinkholes mostly appear when you pour the melted wax into the container while still hot. The wax starts to cool down with time, and the molten wax edges will begin to retract. So the part that touches the container is safe, and the wax in the middle dips.
The dip appears because there’s a big difference in temperature between the wax and the container.
So the best way to prevent the sinkholes from appearing is to pour the wax at a tepid temperature. The lower the temperature of the liquid wax, the better. Of course, it’s also essential to maintain the temperature indoors.
I currently use 464 Soy wax and Naturewax C-3.
Some popular Wax pour temperatures
| WAX | Pour Temperature °F | Pour Temperature °C |
| 464 Soy Wax (Soy) | 135°F | 57°C |
| 444 Soy Wax (Soy) | 135°F | 57°C |
| EcoSoya CB 135 Soy Wax (Soy) | 135°F | 57°C |
| SoyMax M124B (Soy) | 160°F | 71°C |
| IGI 4627 Comfort Blend Wax (Paraffin) | 180°F | 82°C |
| IGI 6006 (Paraffin/Soy Blend) | 170°F | 77°C |
| Golden Brands 454 (Coconut Soy) | 170°F | 77°C |
| Naturewax C-3 (Soy) | 140-160°F | 60-71°C |
| GOLDEN BRANDS 402 (Soy) | 90 – 100°F | 32-38°C |
| Beeswax | 175°F | 79°C |
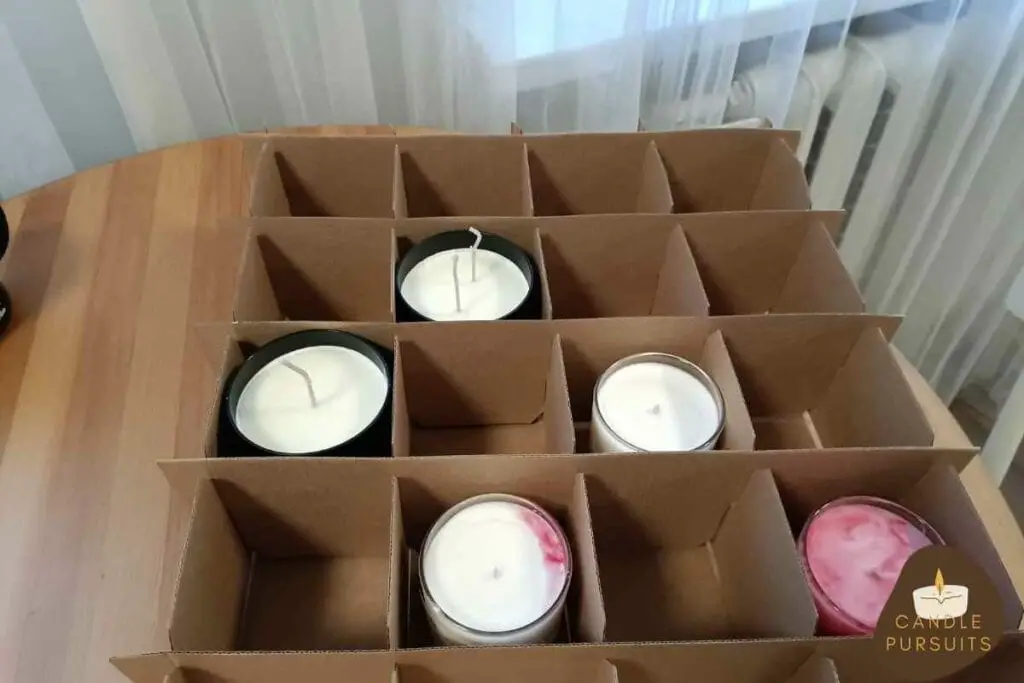
I have found the good practice is to use box (same as in the picture below) to ensure that wax will not cool down too quickly. That helps a lot to prevent from getting sinkholes.
2. Short And Wide Containers
You can keep your candles from getting sinkholes by crafting them in shorter and broader containers. Sinkholes appear most commonly in tall and narrow containers.
So most veteran candle artisans would agree that it’s best to use short and wide containers to craft candles. These containers are better because the wax touches the inner surface better.
3. Proper Wax Type
If you use the correct type of wax for the suitable container, container waxes and single-pour pillars won’t have any sinkholes. It only makes sense that your candles will likely have sinkholes if you use the wrong type of wax.
For example, you will always need to do a second pour with votive wax. So to avoid sinkholes, it’s vital to note the type of wax you use and its nature. To cool down the wax in a container naturally, you must keep at least 1/16 of it empty. Otherwise, sinkholes will appear.
Ways To Fix Candle Sinkholes Without A Heat Gun
Fixing sinkholes in a candle is not a difficult task. It’s pretty easy to fix it if you use a heat gun. But not all of us have heat guns lying around at home. If so, you can quickly fix it without any hassle by using the “second pour” method.
Of course, there are some other methods you could try as well –
1. Using Heat To Level The Candle Surface
A quick and easy fix to cover up any sinkholes in your candle is to use heat to level its surface. As the heat source, you can use a handy hair dryer! To prevent any gaps in the candle, use a toothpick or needle to poke holes around the sinkhole.
You may also use a low-temp oven to fix any candle with sinkholes. Make sure that it is on its highest heat setting. Remember to keep an eye on the candle so that it doesn’t melt too much.
It works the same as a heat gun.
2. Using The “Second Pour” Method
Similar to the method’s name, the “second pour” method involves pouring liquid wax into your candle container a second time. But of course, you will need to save some molted wax beforehand for the second pour.
Don’t forget that you will need to give it some time to settle well after the first pour. When it has solidified completely, you can pour in the molten wax you had set aside beforehand. Generally, you can wait about 2 to 3 hours before pouring the wax again. If you are too hasty with this, the candle can look bad and even cause another hole.
After the second pour, you can poke some holes in the wick to make it solidify properly. Poking holes also help to fill in any gaps within the candle. But make sure to do this when the wax has cooled down. Most call these small holes “relief holes.” They keep the candle from sinking once you light it up.
Conclusion
Crafting a candle can take a lot of time and effort. But after crafting one, finding a sinkhole in the middle can be frustrating. Heat guns are the easiest way to fix them, but you may not have one lying around at home.
If that’s the case, I hope this article on how to fix candle sinkholes without a heat gun will come in handy. I hope you can utilize the methods mentioned here to make beautiful candles. Thanks for stopping by!